Table of Contents
- What is Eclipse?
- Why Choose Eclipse for Programming?
- Popular Plugins in Eclipse
- How to Download and Install Eclipse on Windows
- Step 1: Visit the Eclipse Website
- Step 2: Download Eclipse
- Step 3: Run the Installer
- Step 4: Install Eclipse
- Step 5: Start a New Project
- FAQs About Eclipse Installation
What is Eclipse?
Eclipse is a powerful, free, and open-source Integrated Development Environment (IDE) that supports multiple programming languages, including Java, Python, and C++. It’s a go-to tool for beginners and professionals, making it an excellent choice for coding enthusiasts.
Why Choose Eclipse for Programming?
Eclipse has become one of the most trusted IDEs in the programming world. Here’s why:
- Beginner-Friendly: Its user-friendly interface is perfect for those new to coding.
- Supports Multiple Languages: Whether you’re coding in Java, C++, Python, or PHP, Eclipse has you covered.
- Extensive Plugin Ecosystem: Customize your workspace with a variety of plugins.
- Completely Free: Open-source and free for everyone to use.
Popular Plugins in Eclipse
Enhance your coding experience with these must-have plugins:
| Plugin Name | Purpose |
|---|---|
| Java Development Tools (JDT) | Ideal for Java programming. |
| PyDev | Makes Eclipse a Python IDE. |
| C/C++ Development Tools (CDT) | For C and C++ coding projects. |
| Scala Plugin | Perfect for developing Scala applications. |
| PHPeclipse | Enables PHP development within Eclipse. |
How to Download and Install Eclipse on Windows
Follow these steps to install Eclipse on your Windows 10 or 11 machine:
- Visit the Eclipse Website
Open your browser and navigate to the official Eclipse website.


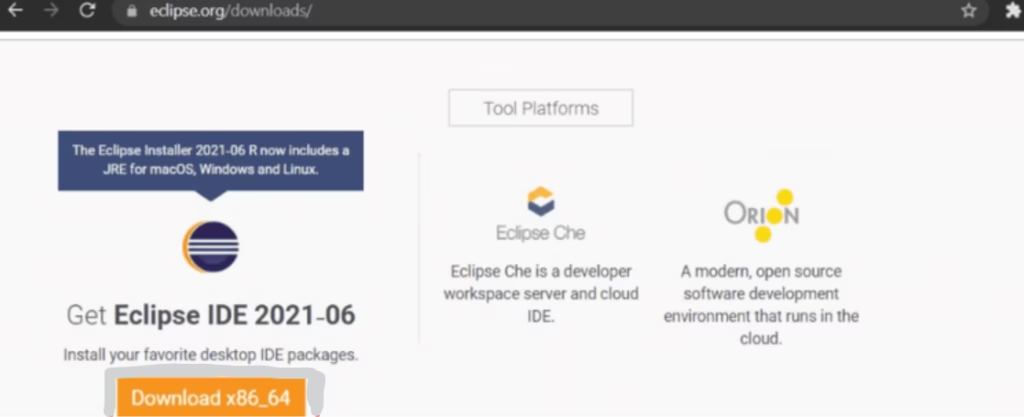
- Download Eclipse
Click on the “Download” button and choose the version compatible with your system (x86_64 for most modern setups).


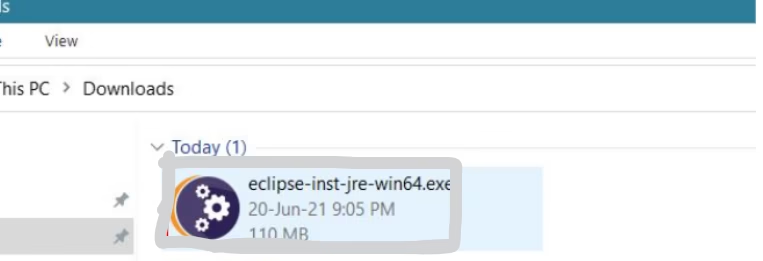
- Run the Installer
Locate the downloaded file, typically namedeclipse-inst-jre-win64.exe, in your Downloads folder. Double-click to launch the installer.


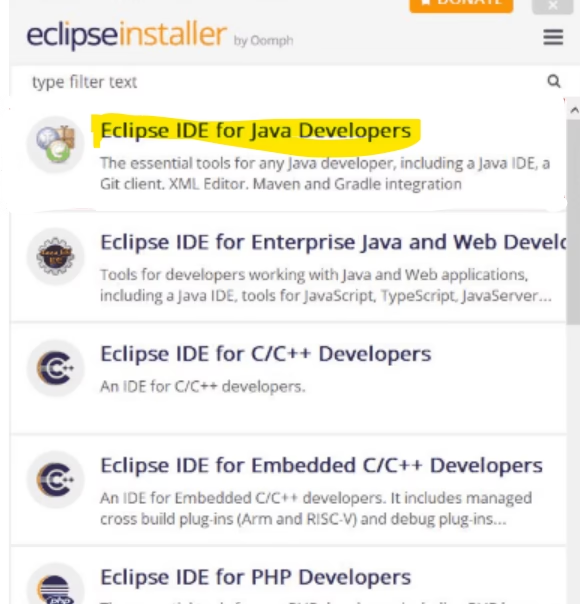
- Choose Your Eclipse Package
Select “Eclipse IDE for Java Developers” or the version that suits your needs.
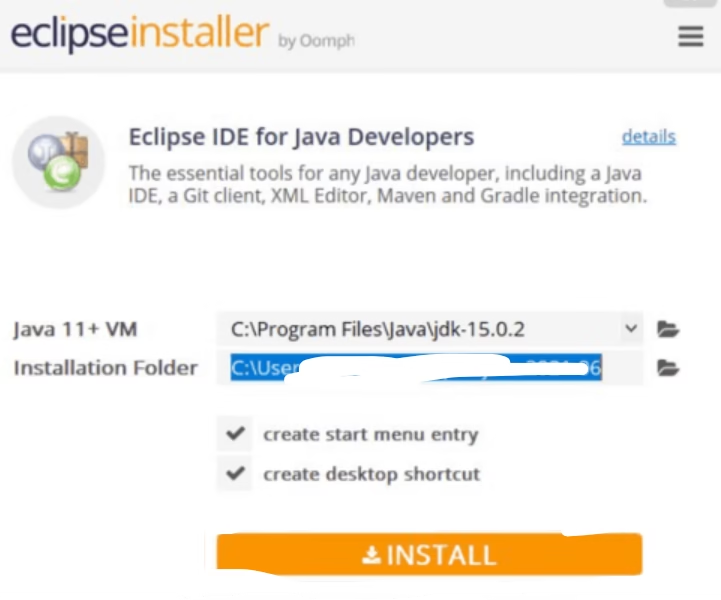
- Install Eclipse
Hit the “Install” button and let the process complete.

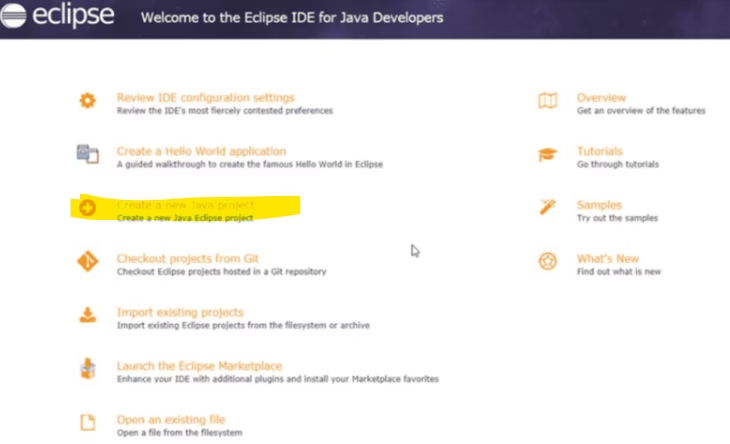
- Start a New Project
Once installed, open Eclipse and select “Create a New Java Project” to dive into your first coding adventure.

Congratulations! You’ve successfully installed Eclipse on your Windows PC.
FAQs About Eclipse Installation
1. What version of Eclipse is best for Java development?
The Eclipse IDE for Java Developers is ideal as it comes pre-configured with essential tools for Java programming.
2. Can I install Eclipse on Windows 11?
Yes, the process is identical to Windows 10. Follow the steps above to get started.
3. What if the installation doesn’t work?
Ensure your system meets the requirements and run the installer as an administrator. If problems persist, consult Eclipse’s official support forums.
Why Eclipse is the Best Choice for Developers
Setting up Eclipse on Windows is a breeze, even for beginners. With its unmatched versatility, extensive plugin support, and intuitive interface, it’s the perfect IDE for coding professionals and learners alike.
Start coding today with Eclipse and unlock endless possibilities in software development!
