Learn how to connect your computer to your organization’s Active Directory domain in this easy-to-follow guide. Whether you’re using Windows or macOS, we’ll walk you through every step to join a domain successfully.
Table of Contents
- What Is a Domain and Why Join One?
- Requirements to Join a Domain
- How to Join a Domain on Windows
- Access System Properties
- Edit Domain Settings
- Authenticate Your Account
- Restart Your Computer
- How to Join a Domain on macOS
- Open Directory Utility
- Enable Active Directory
- Input Domain Details
- Customize Additional Settings
- Bind to the Domain
- Benefits of Joining a Domain
What Is a Domain and Why Join One?
A domain is a centralized network that allows computers and devices to share resources like files, printers, and security policies. Joining a domain simplifies IT management and enhances collaboration, especially in corporate and institutional settings.
Requirements to Join a Domain
Before getting started, ensure the following:
- For Windows: Pro, Education, or Enterprise edition of Windows 10/11.
- For macOS: Access to the Directory Utility tool.
- Network credentials provided by your IT administrator.
How to Join a Domain on Windows
Follow these steps to join a domain on a Windows computer:
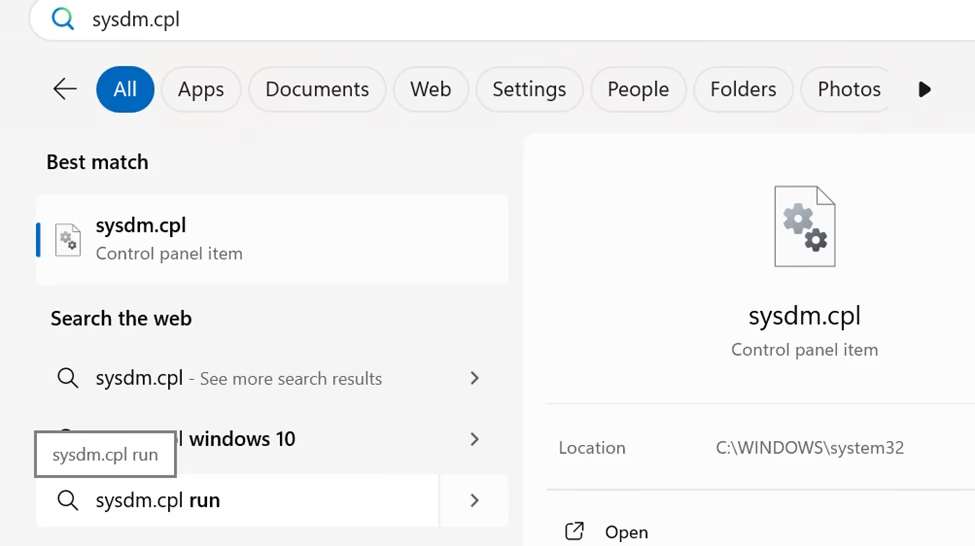
1. Access System Properties
- Open the search bar or press the Windows key.
- Type
sysdm.cpland press Enter. - The System Properties panel will open to the “Computer Name” tab.
2. Edit Domain Settings
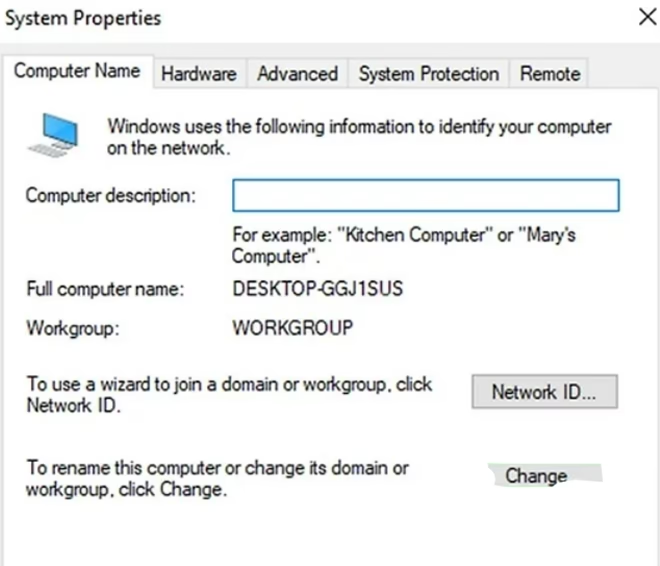
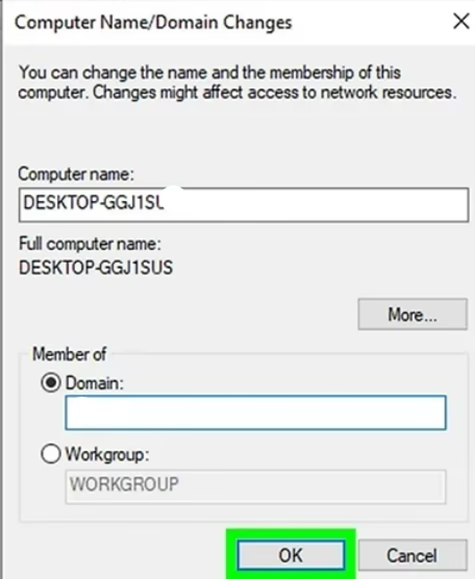
- Click Change… and select the Domain option under “Member of.”
- Enter the domain name (e.g.,
yourcompany.com) provided by your IT administrator.
3. Authenticate Your Account
- Use the username and password of an account with domain-joining privileges.

4. Restart Your Computer
- Restart your computer to complete the process. Your computer will now connect to the domain automatically.

How to Join a Domain on macOS
Here’s how to connect your Mac to an Active Directory domain:
1. Open Directory Utility
- Open Spotlight search (Command + Space) and type Directory Utility.
- Select the app from the search results.

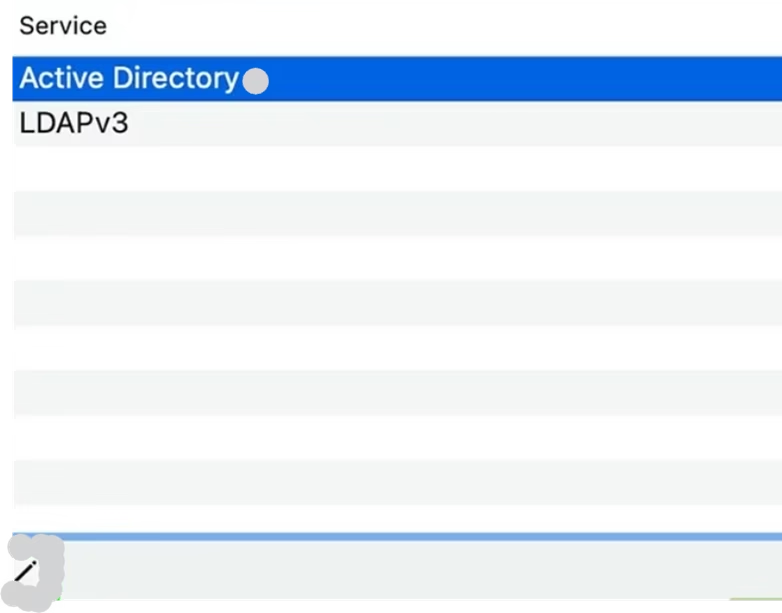
2. Enable Active Directory
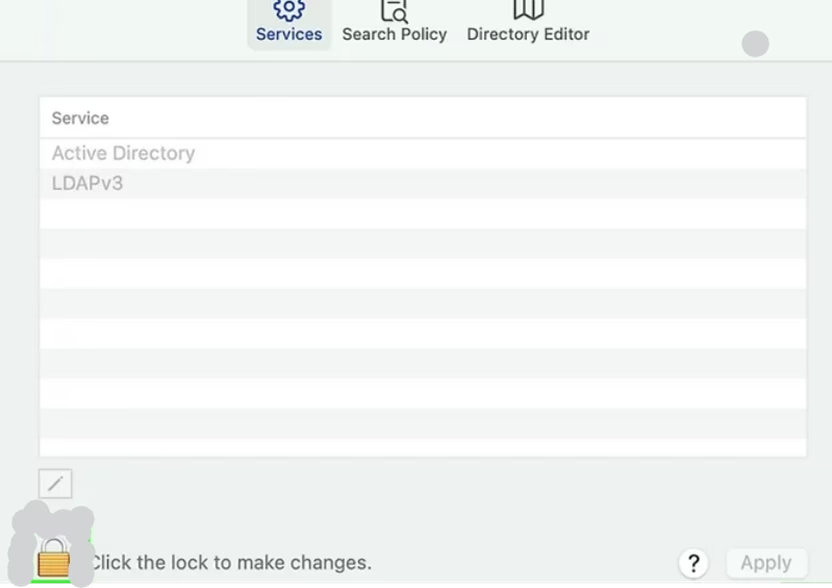
- In Directory Utility, click Services at the top.
- Unlock the tool by clicking the lock icon and entering your admin password.

3. Input Domain Details
- Enter the domain name (e.g.,
yourcompany.com). - Add a Computer ID if needed (avoid using hyphens).
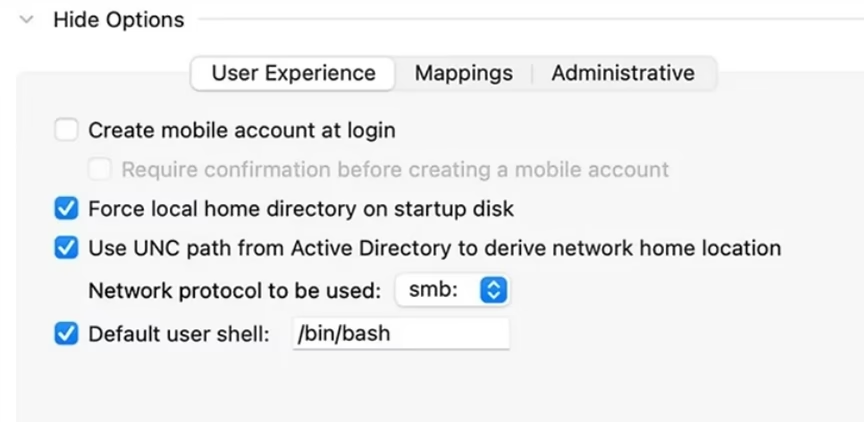
4. Customize Additional Settings
- Expand Show Options to set user experience preferences, mappings, and administrative settings.
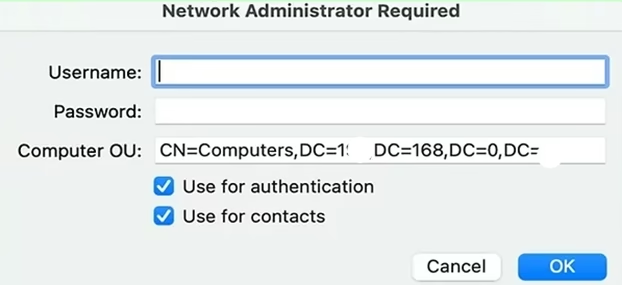
5. Bind to the Domain
- Click Bind and enter the necessary details, including credentials and organizational unit (OU).
- Save and confirm to add your Mac to the domain.
Benefits of Joining a Domain
- Centralized Resources: Access files, printers, and applications.
- Improved Security: Benefit from organization-wide security policies.
- Simplified IT Management: IT administrators can easily manage devices.
